This guide for understanding the Event Manager can be viewed in conjunction with our Bitcoin Wallet Insight Demo - an example Bitcoin application showcasing the Wallet API and Event Manager capabilities for wallet insights and state monitoring.You can deploy this demo to see the Event Manager in action, as well as how it is integrated, before implementing it in your own application to:
- Set up automated monitoring for Bitcoin wallet activities, transactions, and blockchain events
- Create triggers that fire when specific conditions are met (e.g., large transactions, new inscriptions)
- Receive real-time notifications via webhooks to keep your application responsive
Overview
The Event Manager is a powerful service that allows you to monitor Bitcoin blockchain events and receive notifications when specific conditions are met. Unlike user-facing features, the Event Manager is designed as an admin-only service that operates behind the scenes to keep your application informed of important blockchain activities. Key benefits:- Real-time monitoring of wallet addresses, transactions, and blockchain state
- Automated notifications via webhooks when triggers activate
- Flexible trigger conditions for various blockchain events
Architecture Overview
Flow Explanation:- Admin creates triggers via the Maestro Dashboard
- Event Manager monitors the blockchain for specified conditions
- Webhooks fire when conditions are met, sending data to your application
- Your application processes the webhook and takes appropriate actions
Prerequisites
- Node.js ≥16 and npm (or Yarn) installed
- A Maestro API key with Event Manager access
- An existing application (we’ll use our maestro-replit-templates wallet demo as an example)
Complete Event Manager Operations
Configure and Manage Event Triggers in the Maestro Dashboard
The Maestro Dashboard provides a user-friendly interface for managing Event Manager operations. Follow these steps to set up monitoring for your Bitcoin applications:Step 1: Access the Event Manager Dashboard
- Log in to your Maestro Dashboard
- Navigate to the Events tab in the top navbar
- Create a new Webhook

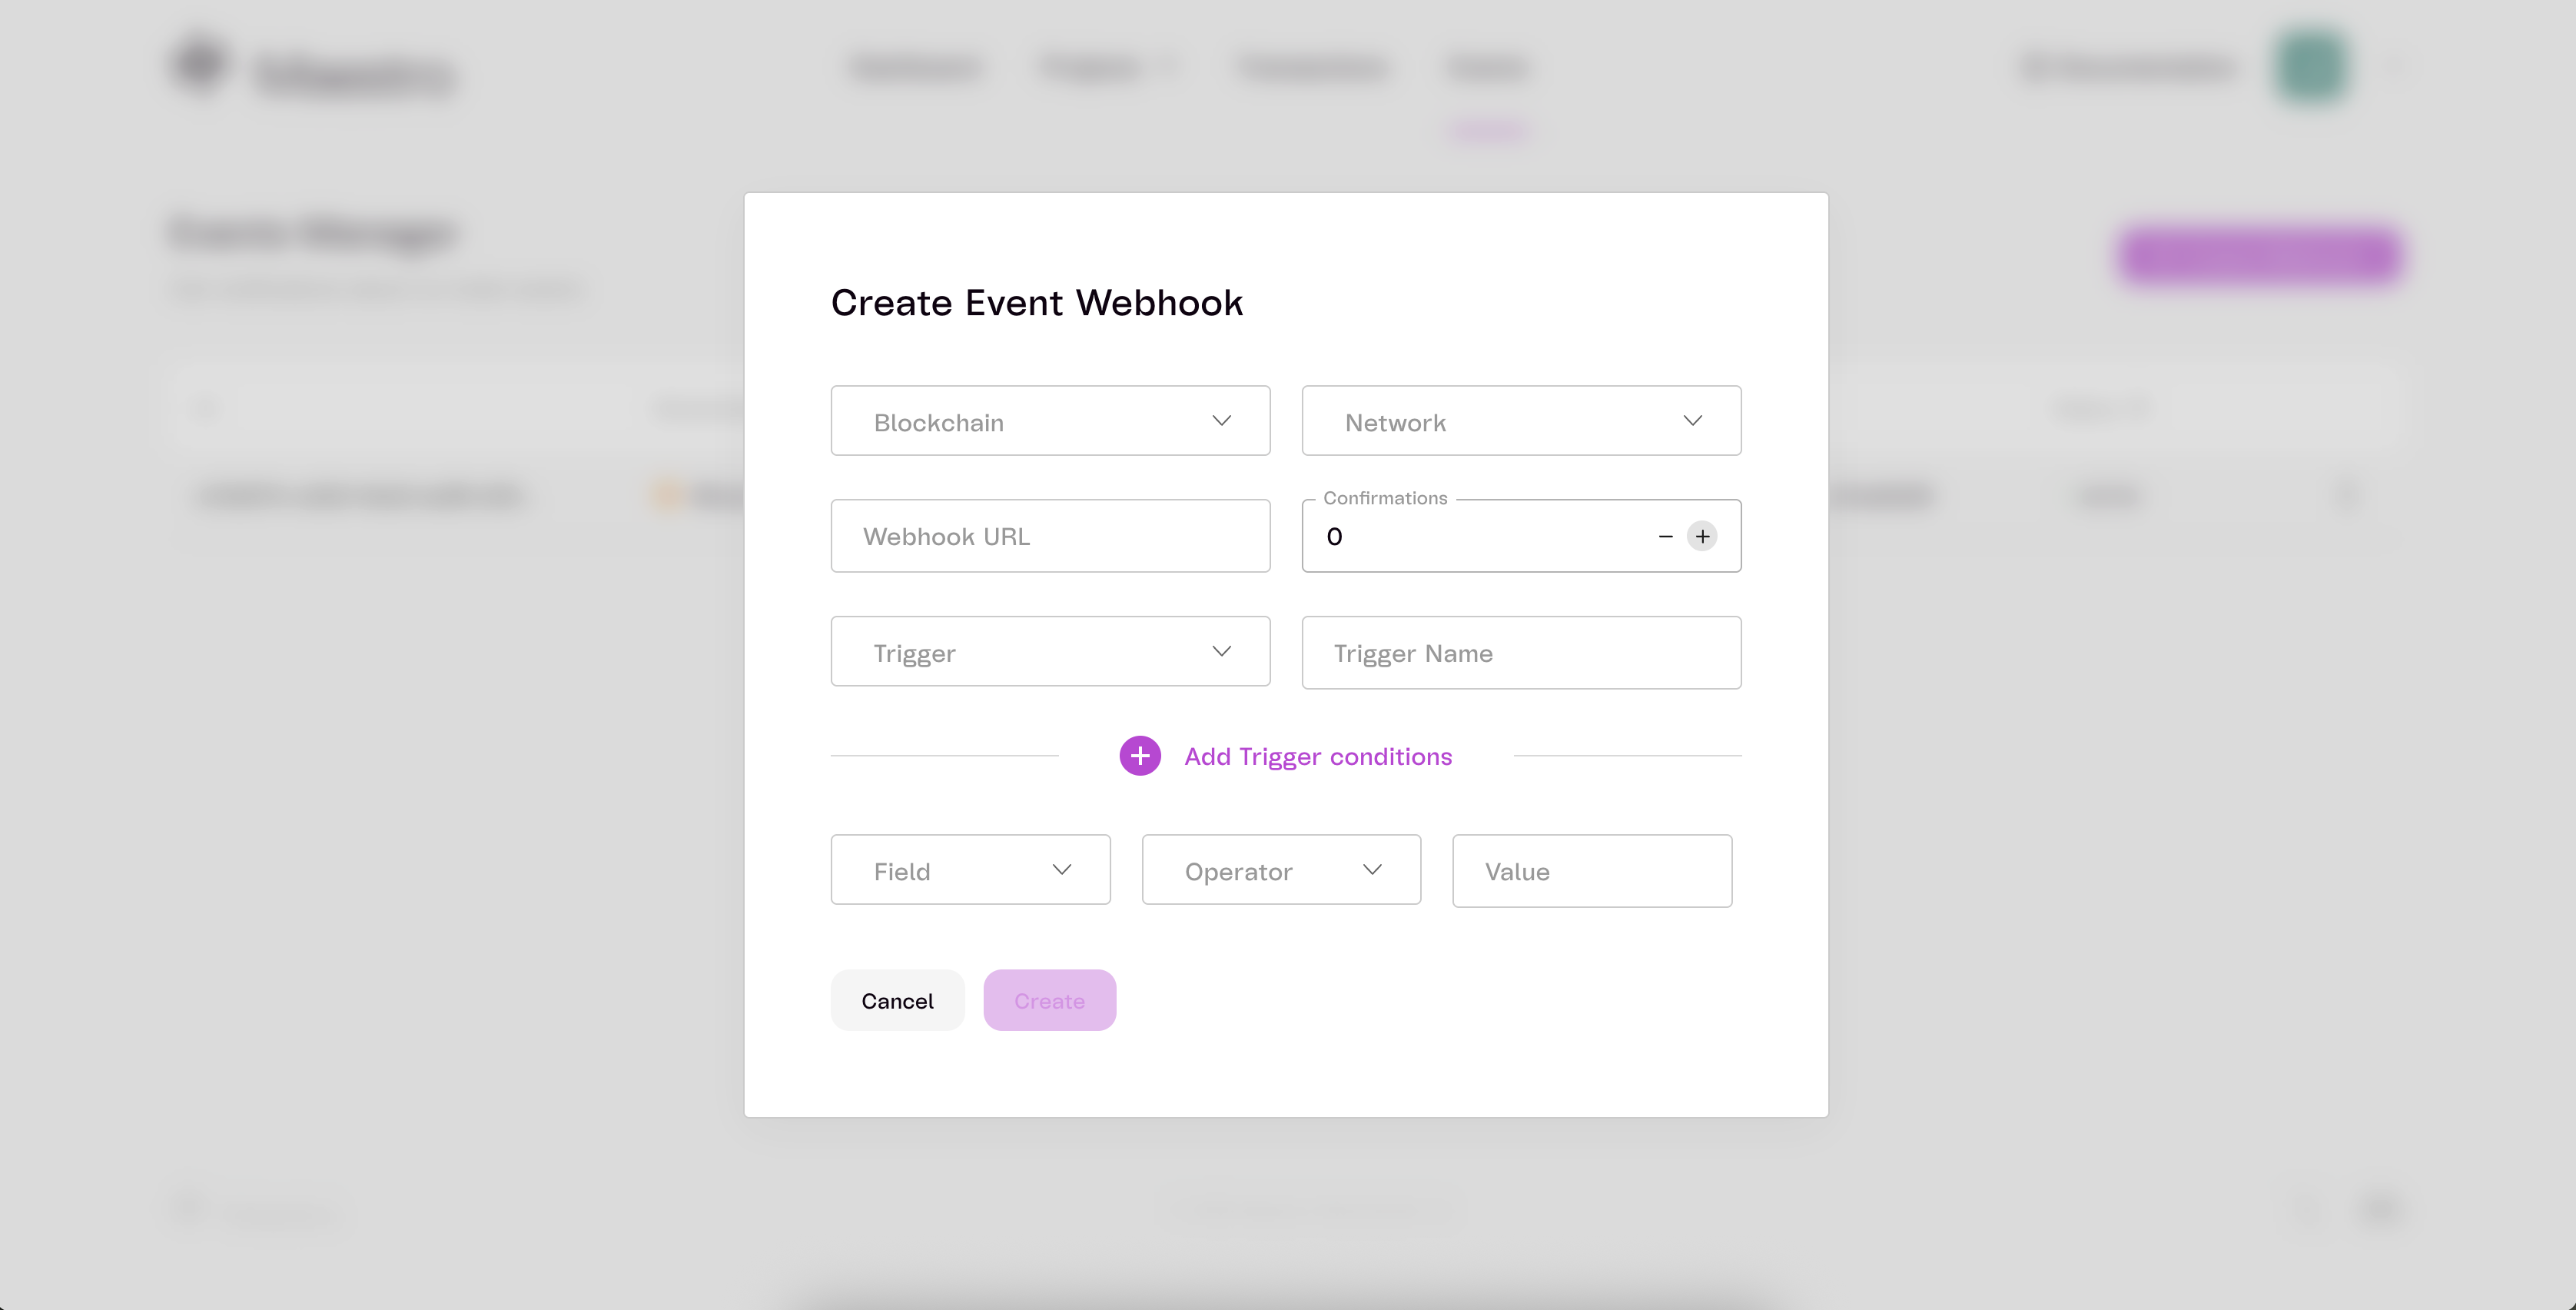
Step 2: Create Your First Webhook
- Click “Create Webhook” to open the event webhook creation wizard
- Configure basic settings:
- Chain: Select “Bitcoin”
- Network: Choose “Mainnet” or “Testnet”
- Webhook URL: Enter your application’s webhook endpoint
- Set confirmation requirements: Choose 1-6 confirmations based on your security needs
- Trigger Type: Select “Transaction” for monitoring Bitcoin transactions
- Trigger Name: Give it a descriptive name (e.g., “Wallet Balance Monitor”)
Testing tip: Use webhook.site to generate a test URL for initial setup
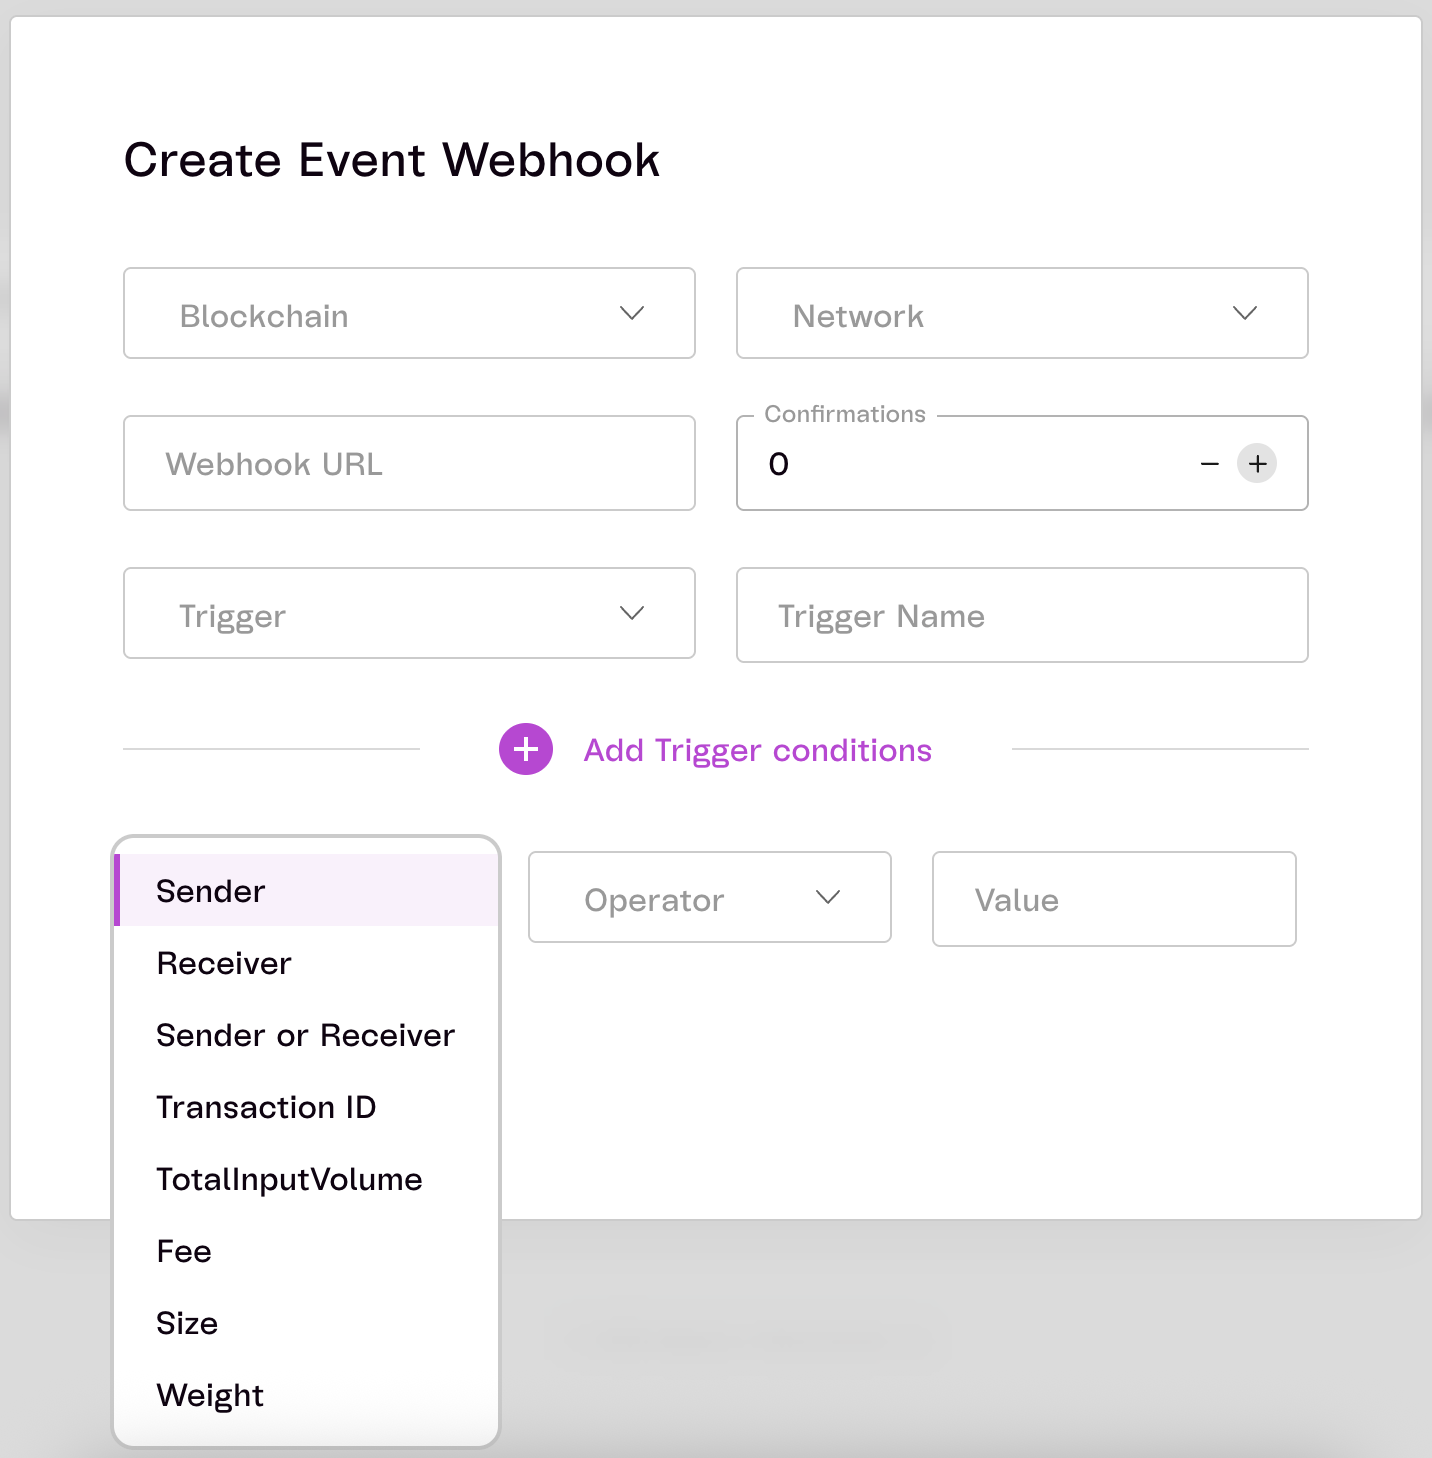
- Configure trigger conditions using the filter builder:
- For wallet monitoring: Set filter key to “Sender or Receiver” with your Bitcoin address
- For large transactions: Set “TotalInputVolume” with operator ”>” and value in satoshis
- For specific addresses: Use “Sender” or “Receiver” filters as needed
- Click “Create” to activate monitoring
Step 3: Test Your Webhook
- Send a test transaction that matches your trigger conditions
- Monitor the Event Logs to see triggered events in real-time
- Check your webhook endpoint to verify you’re receiving notifications
- Review the payload structure to understand the data format for your application
Step 4: Manage Active Webhooks
- View all webhooks in the dashboard with status indicators (Active/Paused)
- Monitor webhook statistics including event count and last triggered time
- Pause/Resume webhooks as needed for maintenance or testing
- Edit webhook settings to modify filters, webhook URLs, or confirmation requirements
- Delete unused webhooks to stay within your account limits and keep things organized
Step 5: Monitor Event Logs
- Filter logs by trigger, date range, or status for easier debugging
- Inspect event details including the full transaction payload and webhook response
- Troubleshoot webhook issues by checking response status codes and error messages
- Export logs for analysis or compliance reporting if needed
Trigger Management
The following snippets are borrowed from the Bitcoin Wallet Insight Demo.1. Creating Triggers
Create triggers to monitor Bitcoin transactions based on specific conditions:2. Listing All Triggers
Retrieve all your active triggers:3. Getting Trigger Details
Fetch detailed information about a specific trigger:4. Updating Triggers
Modify existing triggers (name, filters, status, etc.):5. Deleting Triggers
Remove triggers that are no longer needed:Filter Options
Available filter keys include:- sender: Monitor transactions from specific addresses (operator:
=) - receiver: Monitor transactions to specific addresses (operator:
=) - sender_or_receiver: Monitor transactions involving specific addresses (operator:
=) - transaction_id: Monitor specific transaction IDs (operator:
=) - total_input_volume: Monitor by transaction value (operators:
=,>,>=,<,<=) - fee: Monitor by transaction fee (operators:
=,>,>=,<,<=) - size: Monitor by transaction size in bytes (operators:
=,>,>=,<,<=) - weight: Monitor by transaction weight (operators:
=,>,>=,<,<=)
Event Log Management
6. Listing Event Logs
View logs of triggered events with optional filtering:7. Getting Specific Event Logs
Retrieve detailed information about a specific event log:Advanced Filter Examples
Here are practical examples of different filter configurations:Security Considerations
Common Use Cases
1. Wallet Monitoring
- Track activity on specific wallet addresses
- Get notified when funds are received or sent
- Monitor for suspicious activity patterns
2. Large Transaction Alerts
- Alert when transactions exceed certain thresholds
- Monitor for whale movements
- Compliance and AML monitoring
3. Rune/Inscription Activity
- Track new rune mints or transfers
- Monitor inscription marketplace activity
- Get notified of rare asset movements
4. Portfolio Automation
- Automatically update portfolio values
- Trigger rebalancing based on events
- Generate activity reports
Best Practices
- Test Webhooks: Use tools like webhook.site or ngrok for local webhook testing
- Document Triggers: Keep clear documentation of what each trigger does
- Regular Cleanup: Remove unused triggers to avoid unnecessary API calls and remain below your account’s trigger limits
🎉 You’re Done!
The Maestro Event Manager transforms your application from reactive to proactive by providing real-time blockchain monitoring capabilities. By implementing the admin-only architecture shown in this guide, you can:- Monitor critical wallet activities without constant manual checking
- Respond instantly to important blockchain events
- Automate business logic based on on-chain activities
- Maintain security by keeping event management admin-only