> ## Documentation Index
> Fetch the complete documentation index at: https://docs.gomaestro.org/llms.txt
> Use this file to discover all available pages before exploring further.
# Getting Started
> Quick start guide to get up and running with Maestro APIs. Learn how to create an account, generate API keys, and make your first blockchain API request.
**Quickstart Guide to Maestro**
Learn how to open a Maestro account, create a project API key, and make your first request. **Start building today!**
## Tutorial
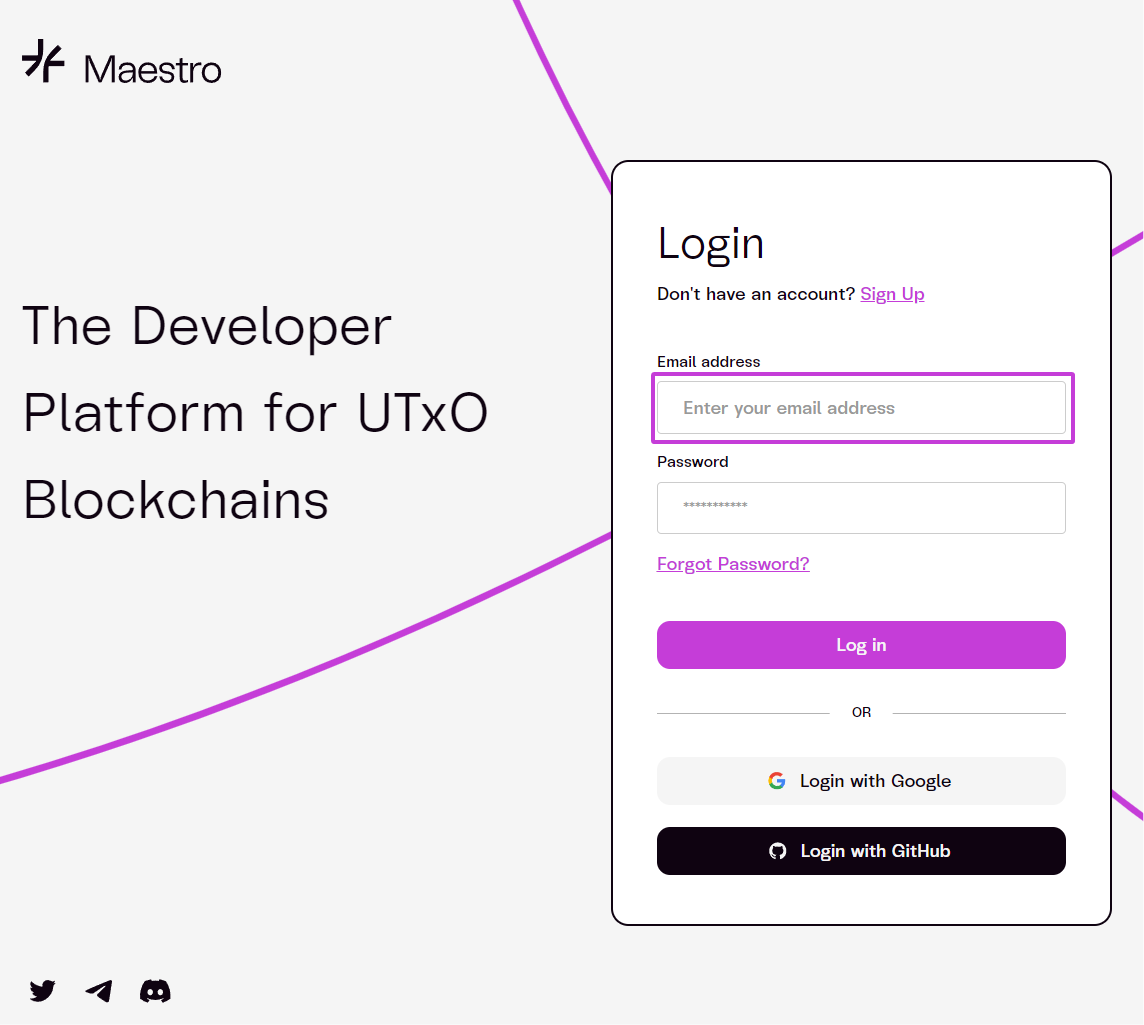
### 1. Sign Up or Log In
👋 ***New to Maestro?*** Create an account for free [here](https://dashboard.gomaestro.org/).
 ***
### 2. Create a Project
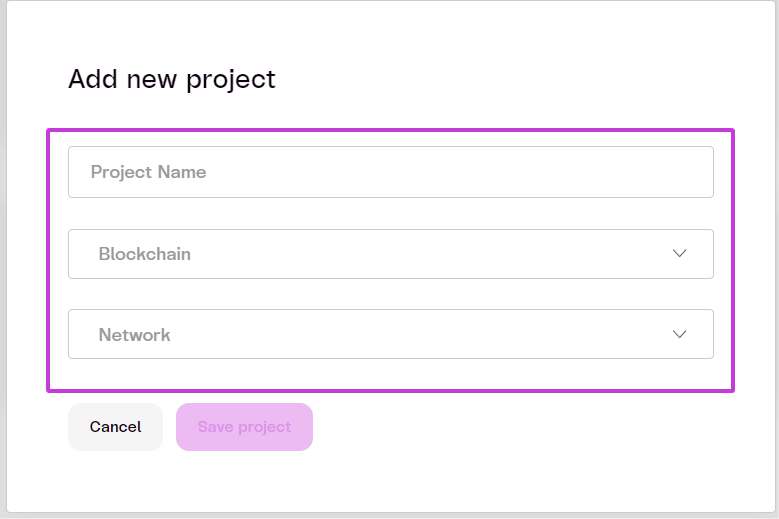
Once logged in to the Dashboard, you can create multiple API projects. Each project will generate a unique `API key` that authorizes your requests on the platform.
The total number of projects you can create depends on your active subscription tier.
* Click on `+ New Project`
***
### 2. Create a Project
Once logged in to the Dashboard, you can create multiple API projects. Each project will generate a unique `API key` that authorizes your requests on the platform.
The total number of projects you can create depends on your active subscription tier.
* Click on `+ New Project`
 * Add new project info
* `Project Name`
* `Blockchain`
* `Network`
* Add new project info
* `Project Name`
* `Blockchain`
* `Network`
 ***
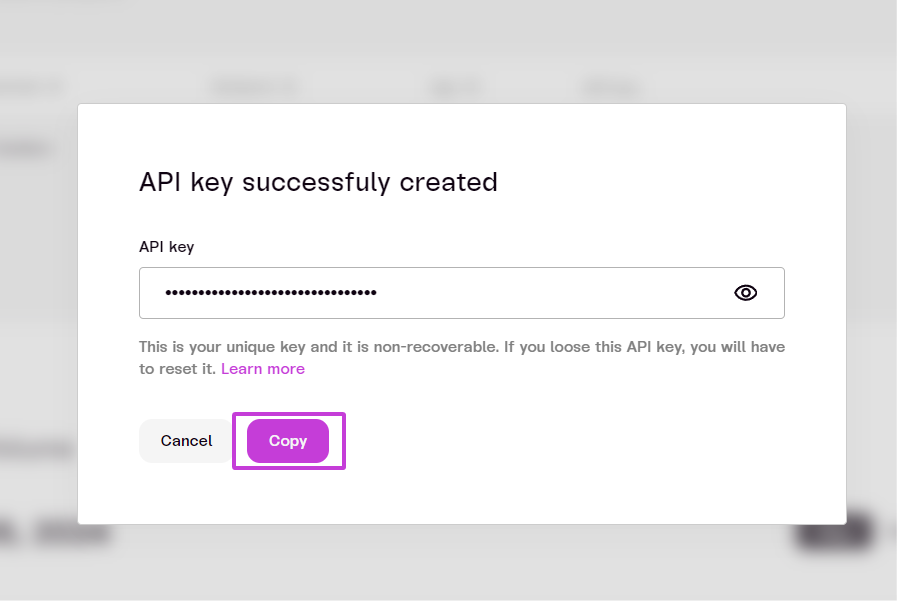
### 3. Copy the URL and API Key
***
### 3. Copy the URL and API Key
 ***
### 4. Your Project Dashboard
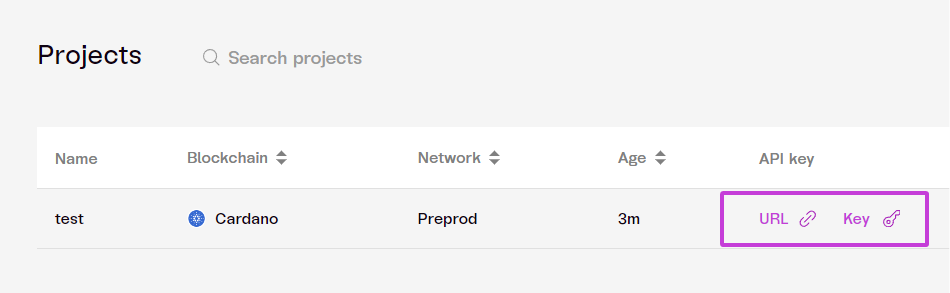
The Projects section will list all created projects. In this example, we will use the `Cardano Preprod` network.
* Copy the project's `URL` and `Key`.
***
### 4. Your Project Dashboard
The Projects section will list all created projects. In this example, we will use the `Cardano Preprod` network.
* Copy the project's `URL` and `Key`.
 | Term | Description |
| :------------------ | :------------------------------------------------------------------------------------------------ |
| Project URL | The base URL is customized for the network you selected for your project. |
| **Project API Key** | A unique key used by the Maestro API to authenticate and authorize all requests for your project. |
Each *API key* is specific to a project and will only function with the network you selected for that project.
***
**Next Steps**
**Congrats!** Now that you've generated your first API key, let's [Make Your First API Request](./make-your-first-api-request).
| Term | Description |
| :------------------ | :------------------------------------------------------------------------------------------------ |
| Project URL | The base URL is customized for the network you selected for your project. |
| **Project API Key** | A unique key used by the Maestro API to authenticate and authorize all requests for your project. |
Each *API key* is specific to a project and will only function with the network you selected for that project.
***
**Next Steps**
**Congrats!** Now that you've generated your first API key, let's [Make Your First API Request](./make-your-first-api-request).